Have you ever wondered how drones stay balanced in the air, especially when the wind is blowing? Or how they can flip, spin, and still land perfectly? The secret lies in a small but incredibly powerful component called a flight controller.
Think of a flight controller as the brain of a drone. Just like your brain constantly processes information from your eyes, ears, and sense of touch to keep you balanced while walking, a flight controller processes data from various sensors to keep a drone stable and responsive in the air.
In the early days of radio-controlled aircraft, pilots had to manually control every aspect of flight. It required incredible skill and years of practice. One wrong move, and the aircraft would crash. But with modern flight controllers, even beginners can fly drones with relative ease. The flight controller does the heavy lifting, making thousands of tiny adjustments every second to keep the aircraft stable.
In this article, we’ll take a deep dive into what flight controllers are, how they work, the different types available, and everything you need to know to understand this essential piece of technology. Whether you’re thinking about building your first drone, curious about how your store-bought quadcopter works, or just fascinated by the technology, this guide will explain it all in simple, easy-to-understand terms.
What Is a Flight Controller?
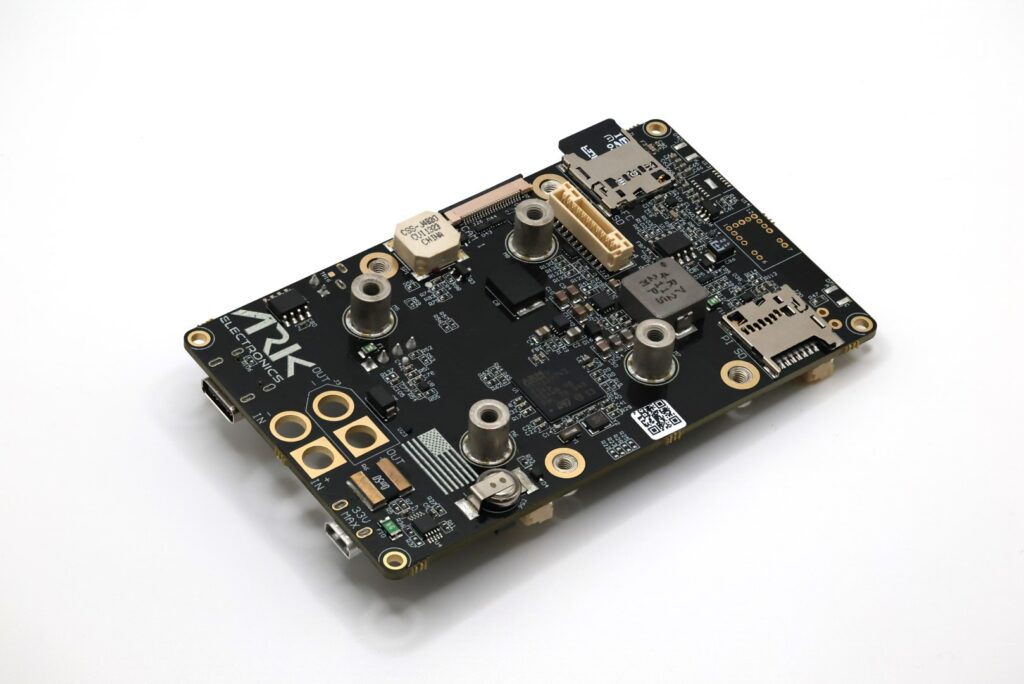
At its most basic level, a flight controller is a circuit board with sensors and a computer chip that controls how a drone flies. It’s usually a small board, often no bigger than a credit card, that sits at the heart of your drone.
Let’s break down what this actually means with a simple analogy. Imagine you’re trying to balance a broomstick on your hand. Your eyes see if the stick is leaning left or right. Your brain processes this information incredibly fast and tells your hand to move slightly to keep the stick balanced. This happens continuously, with tiny corrections happening many times per second.
A flight controller does exactly this, but for a drone in three-dimensional space. Instead of just left and right, it has to manage:
- Roll: tilting left or right
- Pitch: tilting forward or backward
- Yaw: rotating clockwise or counterclockwise
- Throttle: going up or down
The flight controller is constantly monitoring the drone’s position and orientation, comparing it to what the pilot wants (based on the commands from the radio controller), and adjusting the speed of each motor to achieve the desired flight behavior.
Here’s what makes flight controllers special compared to other drone components:
- ESCs (Electronic Speed Controllers): These control the speed of individual motors, but they’re dumb—they only do what the flight controller tells them
- GPS modules: These provide location data, but don’t make any decisions
- Radio receivers: These receive your stick commands, but don’t interpret them
- The flight controller: This is the decision-maker that takes all the inputs and decides what each motor should do
Without a flight controller, you’d need to manually control the speed of each motor independently. On a quadcopter, that’s four different motors you’d have to adjust constantly just to hover in place. It would be virtually impossible for a human to fly. The flight controller makes this possible by automating the complex calculations and adjustments.
How Flight Controllers Work
Now that you know what a flight controller is, let’s understand how it actually works. Don’t worry—we’ll keep this simple and easy to follow.
The Sensors: The Flight Controller’s Eyes and Ears
A flight controller has several sensors built into it that constantly measure what’s happening:
1. Gyroscope (Gyro) Think of this as measuring how fast the drone is rotating. If you spin around in a circle, a gyroscope would measure how fast you’re spinning. In a drone, there are actually three gyroscopes—one for each axis of rotation (roll, pitch, and yaw). The gyroscope is incredibly fast and updates thousands of times per second, making it perfect for detecting even the smallest unwanted movements.
2. Accelerometer This measures acceleration and, by extension, the angle or tilt of the drone. If you tilt your phone, the screen rotates—that’s an accelerometer at work. In a drone, accelerometers help determine which way is “up” and detect how the drone is tilted in space.
3. Magnetometer (Compass) Just like a regular compass, this tells the flight controller which direction is north. This is especially useful for GPS navigation and maintaining a heading. If you want your drone to fly north, the magnetometer helps it know which direction that is.
4. Barometer This measures air pressure, which changes with altitude. By measuring air pressure, the flight controller can estimate how high the drone is flying. This is how drones can hold a specific altitude automatically.
These sensors together form what’s called an IMU (Inertial Measurement Unit). Think of the IMU as the flight controller’s sensory system—like your inner ear that helps you balance.
The Brain: Processing Information
At the center of the flight controller is a microprocessor—a tiny computer chip. This processor is running software (called firmware) that does several jobs:
Step 1: Read the Sensors The processor constantly reads data from all the sensors. This happens incredibly fast—typically 1,000 to 8,000 times per second (measured in Hertz or Hz). That’s why you’ll see flight controllers advertised with numbers like “8kHz gyro sampling rate.”
Step 2: Read Your Commands At the same time, the flight controller is reading the signals from your radio receiver. When you push the stick forward on your controller, that command is sent to the flight controller.
Step 3: Calculate What Needs to Happen This is where the magic happens. The flight controller uses a mathematical algorithm called PID (which stands for Proportional, Integral, Derivative—don’t worry about what those mean right now) to figure out exactly what each motor should do.
Here’s a simple example: Let’s say you want to fly forward. You push the pitch stick forward on your controller. The flight controller receives this command and knows it needs to tilt the drone forward. But it also sees from the gyroscope that the drone is currently level. So it calculates: “I need to speed up the back motors and slow down the front motors to tilt forward.” But it doesn’t just do this blindly—it constantly monitors the gyroscope to make sure it’s tilting at the right rate and will stop tilting when it reaches the desired angle.
All of this happens in a fraction of a second, and it’s repeated continuously throughout the flight.
Step 4: Send Commands to the Motors Finally, the flight controller sends signals to the ESCs (Electronic Speed Controllers), which control how fast each motor spins. These signals are sent many times per second to make smooth, precise adjustments.
The Control Loop
This entire process—reading sensors, reading your commands, calculating corrections, and adjusting motors—happens in what’s called a “control loop.” The loop runs continuously and incredibly fast, which is why drones can react to disturbances (like wind gusts) almost instantaneously and stay stable.
The speed of this loop is crucial. Modern flight controllers run their control loops at 4,000 to 8,000 times per second. This rapid response is what makes modern drones so stable and responsive compared to older systems.
Types of Flight Controllers
Flight controllers come in many different varieties, designed for different types of aircraft and flying styles. Let’s explore the main categories.
By Aircraft Type
1. Multirotor Flight Controllers These are designed for aircraft with multiple rotors (propellers) like quadcopters (4 rotors), hexacopters (6 rotors), or octocopters (8 rotors). They’re the most common type and what most people think of when they think “drone.” These flight controllers are designed to manage the complex task of balancing power across multiple motors to achieve stable flight.
2. Fixed-Wing Flight Controllers These are for aircraft that fly like traditional airplanes with wings. Fixed-wing flight controllers work differently because the aircraft doesn’t hover—it has to keep moving forward to stay in the air. These controllers manage things like ailerons, elevators, and rudders instead of multiple rotors.
3. VTOL (Vertical Take-Off and Landing) Flight Controllers These are hybrid systems that can both hover like a multirotor and fly forward efficiently like a fixed-wing aircraft. Think of something like a tiltrotor aircraft. These flight controllers are more complex because they need to handle both flight modes and the transition between them.
By Purpose and Use Case
1. Racing and Freestyle Flight Controllers These are optimized for speed and responsiveness. Racing drone pilots need incredibly fast reaction times and don’t care much about features like GPS or automated flight modes. These flight controllers typically:
- Have very fast processors (F7 or H7 chips)
- Run at high loop speeds (8kHz+)
- Are lightweight and compact
- Focus on manual flight performance
2. Aerial Photography/Videography Flight Controllers These prioritize smooth, stable flight for capturing clear footage. They often include:
- GPS for position holding
- Advanced stabilization
- Slower, smoother response curves
- Waypoint navigation capabilities
- Return-to-home safety features
3. Long-Range and Autonomous Flight Controllers These are designed for missions that require autonomous flight, waypoint navigation, or flying beyond visual range. Features include:
- Full GPS integration
- Mission planning capabilities
- Telemetry for real-time monitoring
- Advanced failsafe options
- Support for additional sensors
4. DIY/Hobbyist Flight Controllers These are general-purpose controllers that offer flexibility and customization. They’re great for learning and experimenting because they usually support open-source firmware that you can modify and tune extensively.
By Firmware Platform
The firmware is the software that runs on the flight controller. Different firmware platforms have different focuses:
1. Betaflight This is the most popular firmware for racing and freestyle drones. It’s known for excellent flight performance, regular updates, and a user-friendly configuration tool. Betaflight is all about responsiveness and manual flight feel.
2. ArduPilot This is a comprehensive, feature-rich platform designed for autonomous flight. It supports a huge variety of aircraft types and is used in professional applications like mapping, surveying, and research. It has advanced features like terrain following and complex mission planning.
3. PX4 Similar to ArduPilot but with a focus on academic research and commercial applications. It’s highly modular and used in many professional drone systems. Many companies use PX4 as the basis for their custom flight control systems.
4. iNav This firmware focuses on navigation and long-range flight. It’s popular for GPS-enabled multirotors and fixed-wing aircraft. iNav has excellent waypoint navigation and is great for missions that require flying specific routes.
5. KISS “Keep It Super Simple” firmware is known for excellent flight characteristics out of the box with minimal tuning. It’s popular with pilots who want great performance without spending hours tweaking settings.
By Processor Generation
Flight controllers are also categorized by the processor they use:
- F3 processors: Older generation, being phased out
- F4 processors: Mid-range, still common and capable
- F7 processors: High performance, very popular for racing
- H7 processors: Latest generation, fastest processing, allows for highest loop speeds
The processor determines how fast the flight controller can perform calculations, which affects how quickly it can respond to changes and how many features it can support simultaneously.
Key Components and Hardware
Let’s look at what’s actually on a flight controller board and what each component does.
The Microprocessor (MCU)
The MCU (Microcontroller Unit) is the brain—the main chip that does all the computing. Common MCUs you’ll see:
- STM32 F4 series: Runs at about 168-180MHz
- STM32 F7 series: Runs at about 216MHz
- STM32 H7 series: Runs at 400-480MHz
The faster the processor, the more calculations it can do per second, which means faster control loops and better flight performance. However, faster processors also use more power and generate more heat.
Onboard Sensors (IMU)
Modern flight controllers have the IMU sensors (gyroscope and accelerometer) built directly onto the board. You’ll often see specifications like:
- MPU6000: A popular and reliable 6-axis sensor (3-axis gyro + 3-axis accelerometer)
- ICM-20602: A newer, more accurate sensor
- BMI270: Latest generation with better performance
Higher-quality sensors mean more accurate data, which leads to better flight characteristics. Some flight controllers have multiple IMUs for redundancy—if one sensor fails, the other can take over.
Communication Ports
Flight controllers need to talk to various other components. They do this through different types of communication ports:
UART (Universal Asynchronous Receiver/Transmitter) These are serial communication ports used to connect things like:
- GPS modules
- Radio receivers
- Telemetry transmitters
- External sensors
Most flight controllers have 3-6 UART ports. More ports mean you can connect more devices.
I2C (Inter-Integrated Circuit) This is a communication bus that allows multiple devices to connect using just two wires. It’s commonly used for:
- Compass modules
- Airspeed sensors
- LCD displays
SPI (Serial Peripheral Interface) This is a very fast communication protocol used for:
- The onboard gyro sensor
- SD cards for logging
- Some radio receivers
CAN Bus Found on more advanced flight controllers, this is used for connecting redundant systems in professional applications.
Power System
Power Input Flight controllers typically accept a wide voltage range, commonly 4.5V to 6V or up to 30V depending on the model. Many have onboard voltage regulators that convert the battery voltage down to the 3.3V or 5V needed by the electronics.
BEC (Battery Elimination Circuit) Some flight controllers include a BEC that provides power to other components like your radio receiver or camera. The rating (like “2A 5V BEC”) tells you how much current it can supply.
Power Pads/Connectors These are where you solder or plug in your power source. You’ll see labels like:
- VCC/+: Positive power input
- GND/-: Ground (negative)
- VBAT: Battery voltage monitoring
Motor Outputs
These pads or pins send the control signals to your ESCs (which then control the motors). On a quadcopter, you’ll have 4 motor outputs labeled M1, M2, M3, M4. The flight controller sends PWM (Pulse Width Modulation) signals or modern digital protocols like DShot to control motor speed.
Form Factors and Mounting
Flight controllers come in standard sizes:
- 30.5mm x 30.5mm: Standard size for most 5-inch racing drones
- 20mm x 20mm: For smaller builds like 3-inch or micro drones
- 36mm x 36mm: For larger drones
- Custom sizes: For specific applications
The mounting holes are standardized so the flight controller can bolt into your drone frame. Proper mounting is crucial—the flight controller needs to be securely attached but also isolated from vibrations that could affect the gyroscope readings.
Connectivity Features
USB Port Almost all modern flight controllers have a micro-USB or USB-C port for:
- Connecting to your computer for configuration
- Updating firmware
- Reviewing flight logs
Wireless Options Some advanced flight controllers include:
- WiFi: For wireless configuration and telemetry
- Bluetooth: For mobile app connectivity
- Built-in radio: For direct communication without external receivers
Flight Controller Firmware and Software
The hardware is only half the story. The firmware—the software running on the flight controller—is what brings it to life.
What Is Firmware?
Firmware is the specialized software permanently stored in the flight controller’s memory. It’s called “firmware” because it’s somewhere between hardware and software—it’s software that’s closely tied to the specific hardware it runs on.
Think of it like the operating system on your phone or computer, but much more specialized. The firmware contains all the code that:
- Reads sensor data
- Processes your control inputs
- Runs the PID control loops
- Manages safety features
- Communicates with other components
Major Firmware Platforms
Let’s explore the main firmware options in more detail:
Betaflight: The Racing Champion
Betaflight is the most popular firmware for FPV racing and freestyle flying. Here’s why pilots love it:
Strengths:
- Incredibly responsive flight feel
- Extremely active development with frequent updates
- Extensive tuning options for getting exactly the flight characteristics you want
- Large community means lots of tutorials and help available
- Configurator software (Betaflight Configurator) is very user-friendly
- Optimized for acrobatic flying and quick maneuvers
Best for:
- Racing drones
- Freestyle flying
- Pilots who want maximum control and customization
- Anyone flying manually (not using GPS or autonomous modes)
ArduPilot: The Swiss Army Knife
ArduPilot is like the professional toolkit of drone firmware. It’s incredibly comprehensive and powerful.
Strengths:
- Supports virtually every type of aircraft (multirotors, planes, helicopters, boats, rovers)
- Advanced autonomous flight capabilities
- Mission planning with complex waypoint systems
- Terrain following
- Obstacle avoidance support
- Extensive sensor support
- Used in commercial and research applications
- Very robust and well-tested
Best for:
- Autonomous missions
- Mapping and surveying
- Long-range flight
- Fixed-wing aircraft
- Professional applications
- Anyone who needs GPS and waypoint navigation
PX4: The Research Platform
PX4 is similar to ArduPilot but with a different architecture and philosophy.
Strengths:
- Highly modular design
- Excellent documentation for developers
- Strong support from commercial drone manufacturers
- Advanced simulation capabilities for testing
- Good integration with ROS (Robot Operating System)
- Focus on reliability and safety
Best for:
- Research and development
- Commercial applications
- Developers building custom systems
- Academic projects
iNav: The Navigator
iNav is based on an older version of Betaflight but evolved to focus on GPS and navigation features.
Strengths:
- Excellent GPS navigation
- Waypoint missions
- Return to home functionality
- Good for both multirotors and fixed-wing
- Balance between manual flight and autonomous features
- Less resource-intensive than ArduPilot
Best for:
- Long-range exploration
- GPS-guided flight
- Wing flying with navigation
- Pilots wanting GPS features without ArduPilot’s complexity
Configuration Software
Each firmware has companion software that runs on your computer to configure the flight controller:
Betaflight Configurator A clean, modern interface with tabs for different configuration areas. You can:
- Set up your radio channels
- Configure flight modes
- Tune PIDs
- Calibrate sensors
- View real-time sensor data
- Update firmware
Mission Planner / QGroundControl These are “ground control stations” for ArduPilot and PX4. They’re much more complex than Betaflight Configurator because they handle mission planning, telemetry monitoring, and advanced features. You can:
- Plan waypoint missions on a map
- Monitor your drone in real-time during flight
- Analyze flight logs
- Configure hundreds of parameters
- Set up complex safety rules
Firmware Updates
Firmware gets updated regularly to add new features, improve performance, and fix bugs. Updating firmware is usually straightforward:
- Download the new firmware file
- Connect your flight controller to your computer via USB
- Use the configurator software to flash the new firmware
- Reconfigure any settings that were reset
Important note: Always backup your configuration before updating firmware. Sometimes updates reset all your settings to defaults.
Open Source vs. Proprietary
Most popular flight controller firmwares are open source, meaning:
- The code is freely available for anyone to view and modify
- They’re developed by communities of volunteers
- They’re free to use
- Updates and features come from community contributions
Proprietary firmware (like DJI’s system) is:
- Closed source—only the company can modify it
- Usually very polished and user-friendly out of the box
- Less customizable
- Integrated with the manufacturer’s ecosystem
Open source firmware gives you more freedom and flexibility, while proprietary systems often offer a more refined, integrated experience with less setup required.
Flight Modes and Capabilities
One of the most powerful aspects of modern flight controllers is their ability to operate in different flight modes. Each mode changes how the drone responds to your control inputs.
Manual Flight Modes
Acro Mode (Acrobatic/Rate Mode) This is the most “raw” flying experience. When you move the sticks:
- The drone rotates at a rate proportional to stick movement
- When you center the sticks, the drone stops rotating but doesn’t level itself
- You have complete control but also complete responsibility for keeping it level
- This is what racing pilots use for maximum control
Think of it like riding a bike with no hands—possible and fun when you’re skilled, but requiring constant attention.
Angle Mode (Self-Leveling/Stabilized) This is much more beginner-friendly:
- The stick controls the angle of tilt
- When you center the sticks, the drone automatically levels itself
- There’s usually a maximum tilt angle limit (like 50 degrees) for safety
- Much harder to crash because the drone fights to stay level
This is like power steering in a car—it helps you maintain control.
Horizon Mode This is a hybrid between Acro and Angle:
- At small stick movements, it behaves like Angle mode (self-leveling)
- At large stick movements, it behaves like Acro mode (allows flips and rolls)
- When you center the sticks, it levels itself
- Great for freestyle flying where you want both stability and the ability to do tricks
GPS-Assisted Modes
These modes require a GPS module connected to your flight controller.
Position Hold / Loiter The drone uses GPS to maintain its position:
- When you let go of the sticks, the drone holds its exact latitude, longitude, and altitude
- It will fight wind and drift to stay in place
- Makes it very easy to take aerial photos or video
- Great for beginners
Return to Home (RTH) This is a critical safety feature:
- At the push of a button (or automatically if signal is lost), the drone returns to where it took off
- It climbs to a safe altitude, flies back to the launch point, and lands
- Some systems can avoid obstacles on the way back
- Requires GPS lock at takeoff to record the home position
Follow Me The drone tracks and follows your GPS position:
- Useful for filming yourself while doing activities
- Can maintain a specific distance and altitude relative to you
- Requires GPS on both the drone and your controller/phone
Autonomous Flight Modes
Waypoint Navigation You can plan a route on a map with multiple waypoints:
- The drone flies automatically from point to point
- You can set altitude, speed, and actions at each waypoint
- Great for mapping, surveying, or repetitive inspection tasks
- Used heavily in commercial applications
Orbit Mode (Point of Interest) The drone circles around a specific GPS coordinate:
- You set the center point and radius
- The drone maintains a circular path, always pointing its camera at the center
- Perfect for getting cinematic shots of buildings or landmarks
Altitude Hold The drone maintains a specific height using the barometer:
- You still control horizontal movement
- Throttle stick controls climb/descent rate
- Releases you from having to constantly adjust throttle to maintain altitude
Safety Features and Failsafes
Modern flight controllers have multiple safety systems:
Low Battery Failsafe
- Monitors battery voltage
- When voltage drops to a critical level, either warns you or automatically returns home
- Prevents crashes from dead batteries
Lost Signal Failsafe
- If radio connection is lost for a set time (usually 1-2 seconds)
- Can be configured to: land immediately, return to home, or continue last command
- Critical for preventing flyaways
Geofencing
- Creates a virtual boundary
- Drone won’t fly outside a defined area
- Useful for flying near airports or restricted areas
Motor Arming Checks
- Prevents motors from starting unless certain conditions are met
- Checks GPS lock, compass calibration, sensor health
- Prevents takeoffs when something is wrong
Advanced Features
Obstacle Avoidance Some flight controllers can integrate with sensors (like lidar or cameras) to detect and avoid obstacles automatically.
Precision Landing Uses optical flow or visual markers to land on the exact takeoff spot or a designated landing pad.
Automatic Takeoff and Landing Pre-programmed sequences that safely take off and land with no pilot input.
Smart Orientation (Headless Mode) The drone moves relative to you rather than its own front:
- Push forward and it goes away from you, regardless of which way it’s facing
- Easier for beginners but less precise
Configuration and Tuning
Setting up a flight controller properly is crucial for good flight performance. Let’s walk through the process step by step.
Initial Setup Process
1. Physical Installation First, you need to mount the flight controller in your drone:
- Orient it correctly (usually with an arrow pointing forward)
- Mount it with vibration dampening (soft rubber grommets or foam)
- Ensure it’s level—if it’s tilted, the drone will think it’s tilted when it’s actually level
- Secure all connections
2. Connecting to Your Computer
- Install the appropriate configurator software on your computer
- Connect the flight controller via USB
- The configurator should detect the flight controller and show its current firmware version
3. Flash Firmware (if needed)
- Choose the correct firmware version for your flight controller hardware
- Download and flash it through the configurator
- Wait for the process to complete (usually 1-2 minutes)
Sensor Calibration
For the flight controller to work properly, its sensors need to be calibrated.
Accelerometer Calibration This tells the flight controller what “level” means:
- Place the drone on a perfectly level surface
- Start the calibration in the configurator
- The flight controller takes multiple readings to establish what level is
- Some systems require you to place it on all six sides (top, bottom, all four sides)
- Don’t move or bump it during calibration
Compass Calibration This is needed if you have a GPS module with a compass:
- Move away from metal objects and power lines (they interfere with compasses)
- Start the calibration
- Usually requires rotating the drone through various orientations
- Some systems have you spin in place holding the drone
- The system learns what magnetic field variations are normal
ESC Calibration This ensures all your motors respond consistently:
- Connect all ESCs to the flight controller
- Enter ESC calibration mode
- Usually involves setting throttle to maximum, then minimum
- The ESCs learn the range of signal values
- Critical for balanced motor response
Radio Setup and Channel Mapping
Your radio transmitter sends signals to the flight controller through a receiver. Setting this up correctly is essential.
Binding Receiver to Transmitter First, your receiver needs to be “bound” (paired) to your specific transmitter:
- Put the receiver in bind mode
- Put the transmitter in bind mode
- They establish a connection
- This only needs to be done once
Channel Mapping The configurator shows what each stick and switch on your transmitter controls:
- Channel 1 (Aileron/Roll): Right stick left/right
- Channel 2 (Elevator/Pitch): Right stick up/down
- Channel 3 (Throttle): Left stick up/down
- Channel 4 (Rudder/Yaw): Left stick left/right
- Channel 5+: Switches for flight modes, arming, etc.
You need to:
- Move each stick and verify the correct channel responds in the configurator
- Check that the direction is correct (moving stick right makes the bar go right)
- If backwards, reverse that channel in your transmitter or configurator
- Set endpoints so the values range from approximately 1000 to 2000
Flight Mode Setup Assign a switch on your transmitter to change flight modes:
- Choose a 2-position or 3-position switch
- Set ranges for each mode (e.g., below 1300 = Angle, 1300-1700 = Horizon, above 1700 = Acro)
- Test by flipping the switch and watching the mode indicator change
PID Tuning Fundamentals
PID tuning is how you adjust how the flight controller responds. It can seem intimidating, but understanding the basics helps a lot.
What is PID? PID stands for Proportional, Integral, Derivative. These are three different ways the flight controller responds to errors (difference between where you want the drone and where it is):
- P (Proportional): Responds directly to how far off you are. Higher P = stronger, faster response
- I (Integral): Responds to errors that persist over time. Helps eliminate drift
- D (Derivative): Responds to how fast the error is changing. Adds damping to prevent overshooting
Starting Point Most firmwares come with default PID values that work reasonably well. Start there and only tune if you notice problems.
Common Symptoms and Fixes:
- Oscillations/Wobbles: P is too high, reduce it
- Slow, mushy response: P is too low, increase it
- Bouncing back after quick stops: D is too low, increase it
- Drift in one direction: I is too low, increase it
- Feels locked in, hard to control: D is too high, reduce it
The Tuning Process:
- Start with a safe, default tune
- Make small changes (5-10% at a time)
- Test fly after each change
- Record what you changed and the result
- When you find good values, note them down
Don’t over-tune: A perfectly tuned drone is smooth in all conditions but still responsive. Don’t chase perfection—there’s always a trade-off between stability and responsiveness.
Common Configuration Mistakes
1. Skipping Calibration Always calibrate your accelerometer and compass. Skipping this causes drift and unstable flight.
2. Wrong Motor Direction Motors need to spin in specific directions. If even one is wrong, the drone will flip on takeoff. Always check motor directions using the configurator before adding propellers.
3. Incorrect Motor Order Motors need to be plugged into the right outputs on the flight controller. The configurator shows which motor is which—verify this matches your physical setup.
4. Poor Vibration Isolation If the flight controller vibrates too much, the gyroscope gets noisy data. Use soft mounting or foam tape.
5. Mounting at an Angle If the flight controller isn’t level, the drone will drift. Always mount it as level as possible and tell the software if you had to mount it at an angle.
6. Too Aggressive Tuning Starting with super high PIDs leads to oscillations and potentially dangerous flight. Start conservative and work up.
7. Not Testing Failsafes Always test what happens when you turn off your transmitter before your first real flight. Make sure failsafe is configured to do what you want (land or return home).
Popular Flight Controller Boards
Let’s look at some of the most popular and widely-used flight controllers on the market. These represent different categories and use cases.
For Racing and Freestyle
Speedybee F7 V3 This is a very popular all-in-one board (flight controller + ESCs on one board):
- STM32 F7 processor
- Onboard Bluetooth for wireless configuration
- Built-in current sensor
- 8 UART ports for peripherals
- Great performance at a reasonable price
- Compact 30x30mm size
TBS Source One V5 From Team BlackSheep, known for quality:
- H7 processor for maximum performance
- Dual gyros for redundancy
- Excellent noise filtering
- Rock-solid reliability
- Popular in the racing community
Holybro Kakute H7 High-end racing controller:
- STM32 H7 processor
- Dual ICM gyros
- Built-in barometer
- 7 UARTs
- Blackbox logging to onboard flash memory
For GPS and Autonomous Flight
Pixhawk 2.4.8 The classic DIY/hobbyist autonomous flight controller:
- Based on PX4/ArduPilot
- Runs STM32 F4 processor
- Multiple redundant sensors
- Modular design with expandable ports
- Affordable and well-documented
- Huge community support
Pixhawk 4 The upgraded version:
- Faster processor
- Better sensors
- More modern design
- Improved power management
- Multiple CAN ports for redundancy
- Professional-grade reliability
Cube Orange Professional-grade autonomous controller:
- Three redundant IMUs
- Excellent vibration isolation
- Robust design for commercial applications
- Wide operating temperature range
- Carrier boards available for different applications
- Premium price but premium performance
Holybro Kakute H7 (with iNav) Yes, the same board can be used for racing OR navigation depending on firmware:
- Run iNav firmware for GPS missions
- 30x30mm fits smaller builds
- More affordable than Pixhawk systems
- Good balance of features and size
Commercial/Professional Options
DJI Naza/A3/N3 DJI’s flight controllers for custom builds:
- Proprietary firmware (can’t run Betaflight/ArduPilot)
- Extremely smooth flight characteristics
- Very good GPS performance
- Excellent stabilization for cameras
- Premium price
- Limited customization compared to open-source options
- Great for professional cinematography
Freefly Alta X Ultra-high-end for professional cinema:
- Redundant systems throughout
- Certified for flying expensive camera equipment
- Can lift very heavy payloads
- Enterprise-level reliability
- Extremely expensive (thousands of dollars)
Budget-Friendly Options
Matek F405 Series Excellent value controllers:
- STM32 F4 processor (older but still very capable)
- All standard features
- Good build quality
- Well-supported by community
- Perfect for first-time builders
SpeedyBee F405 Another great budget option:
- Bluetooth connectivity
- Good sensor quality
- Clean design
- Usually under $50
Feature Comparison
When choosing a flight controller, consider:
For Racing/Freestyle:
- Fast processor (F7 or H7)
- High loop rate capability
- Small size (20x20 or 30x30mm)
- Good noise filtering
- Betaflight support
For Autonomous/GPS Flight:
- ArduPilot or PX4 support
- Multiple UART ports for peripherals
- Good compass integration
- Telemetry support
- Larger size acceptable for more ports
For Beginners:
- Clear documentation
- Large community
- Pre-configured settings available
- Affordable to replace if damaged
- Good software support
Price Ranges:
- Budget: $20-40 (basic F4 controllers)
- Mid-range: $40-80 (F7 controllers with good features)
- High-end: $80-150 (H7 controllers, dual gyros, premium features)
- Professional: $150-500+ (Pixhawk systems, redundant designs)
- Enterprise: $1000+ (certified systems for commercial use)
Conclusion
Flight controllers are truly the unsung heroes of modern drone technology. From the tiny board that barely weighs a few grams to the sophisticated software running on it, flight controllers make the impossible possible—they turn a collection of parts into a stable, controllable, flying machine.
We’ve covered a lot of ground in this article. We started by understanding what a flight controller is—essentially the brain that processes sensor data and controls motor speeds thousands of times per second to keep a drone stable and responsive. We explored how they work, from the gyroscopes and accelerometers that act as their senses, to the PID algorithms that calculate the perfect motor speeds, to the control loops that make it all happen in real-time.
We looked at the many different types of flight controllers available, each optimized for different purposes—from lightweight racing controllers designed for split-second responsiveness, to feature-rich autonomous controllers capable of flying complex missions without any pilot input. We examined the key components that make up a flight controller board, from the processor that does the thinking to the communication ports that let it talk to other devices.
The firmware running on flight controllers is just as important as the hardware. Whether it’s Betaflight’s focus on racing performance, ArduPilot’s comprehensive autonomous capabilities, or PX4’s modular research-friendly design, the software determines what your flight controller can do and how well it does it.
We explored the various flight modes that make modern drones so versatile—from fully manual acro mode that gives experienced pilots complete control, to GPS-assisted modes that let beginners fly with confidence, to fully autonomous waypoint navigation that enables commercial applications.
Finally, we walked through the configuration and tuning process, demystifying concepts like PID tuning and showing that with patience and careful adjustment, anyone can set up a flight controller properly.
Choosing the Right Flight Controller
So how do you choose the right flight controller for your needs? Ask yourself these questions:
What will you fly?
- Racing/Freestyle → Betaflight-compatible F7/H7 racing controller
- Photography/Video → GPS-capable controller with smooth tuning
- Long-range/Autonomous → Pixhawk or similar running ArduPilot/PX4
- Learning/Experimenting → Budget-friendly F4 or F7 with good documentation
What’s your experience level?
- Beginner → Choose something with lots of tutorials and community support
- Intermediate → Branch out to more specialized options
- Advanced → Consider high-end or professional-grade systems
What’s your budget? Don’t cheap out too much—a quality flight controller is worth the investment. But you also don’t need the most expensive option to have a great flying experience. Mid-range options often offer 90% of the performance at 50% of the cost.
The Journey Continues
Understanding flight controllers is just the beginning of your journey into the amazing world of drones and UAVs. The technology continues to evolve rapidly. Processors get faster, sensors get more accurate, and firmware becomes more capable with each update.
The beauty of modern flight controllers, especially those running open-source firmware, is that they’re constantly improving. A flight controller you buy today will likely get better over time as new firmware updates add features and improve performance.
Whether you’re building your first racing drone, setting up an autonomous mapping system, or just trying to understand the technology better, flight controllers are at the heart of it all. They’ve democratized flight, making it accessible to hobbyists, beneficial for businesses, and exciting for enthusiasts.
Take your time, do your research, and don’t be afraid to experiment. The drone community is incredibly helpful and welcoming to newcomers. There are countless forums, Discord servers, YouTube channels, and local clubs where you can learn, ask questions, and share your experiences.
Most importantly, remember that while flight controllers are complex and sophisticated pieces of technology, they’re ultimately tools designed to help you fly. Don’t get so caught up in the technical details that you forget the joy of flight itself. Get out there, fly safe, and enjoy the incredible capabilities that modern flight controllers make possible.